

Back in November, my husband and I made a pretty sudden move from Boston to Salt Lake City. It wasn't something we were planning on doing, but when the opportunity presented itself, it felt like an offer we couldn't refuse. So we sadly said goodbye to all of our great friends and packed up our little 600 square foot apartment and made the loooooonnngggg drive west.
We contemplated whether we should look into renting or buying in Utah, and I gotta say, the thought of owning my own home, where I could do whatever I wanted design-wise (dreamy sigh), was very appealing! But we're still in a transient stage in our lives and our stay in Utah will most likely be a short one, so renting seemed like the best option.
The limitations that come with renting can be SO frustrating, but I was determined to do some DIY projects to really make this new space feel like a home, and I want anyone reading this to know whether you're renting or not, you can do easy, affordable projects that have a big impact on your space!
So with that in mind, let's dive right in to how to make these DIY Floating Wooden Shelves!
SUPPLIES
- 2' x 4' Pine Boards
- Minwax Pre-Stain Wood Conditioner
- Minwax Early American Interior Stain
- Metalic Corner Brace - 2 per shelf
- 4" Heavy Duty Corner Brace - 2 per shelf
- Valspar Flat Black Spray Paint (any brand of flat black spray paint will work)
- Drywall Anchors

We sanded our boards and treated them with Miniwax Pre-Stain Wood Conditioner to help the stain apply evenly.


Then we used the Minwax Early American Interior Stain which created a gorgeous, rich warm tone to our wood! The L and Corner Brackets were metallic and we knew they would be showing. I wanted them to be black to add a fun industrial modern flair, so we used Valspar Flat Black Spray Paint to get that look and I LOVE how it turned out!


We used painters tape to tape out where the shelves would go, and spaced them 18" apart. This was really helpful for us to get a feel for how it would look, and helped to get the spacing right before we started drilling holes in the walls!

From there, we used drywall anchors to secure the braces to the wall. We flipped the braces upside down so that you would see more of them (we love that pop of black) and because it made it soooo easy to just set the boards on top when we were done!


Voilà! You have shelves!!!!
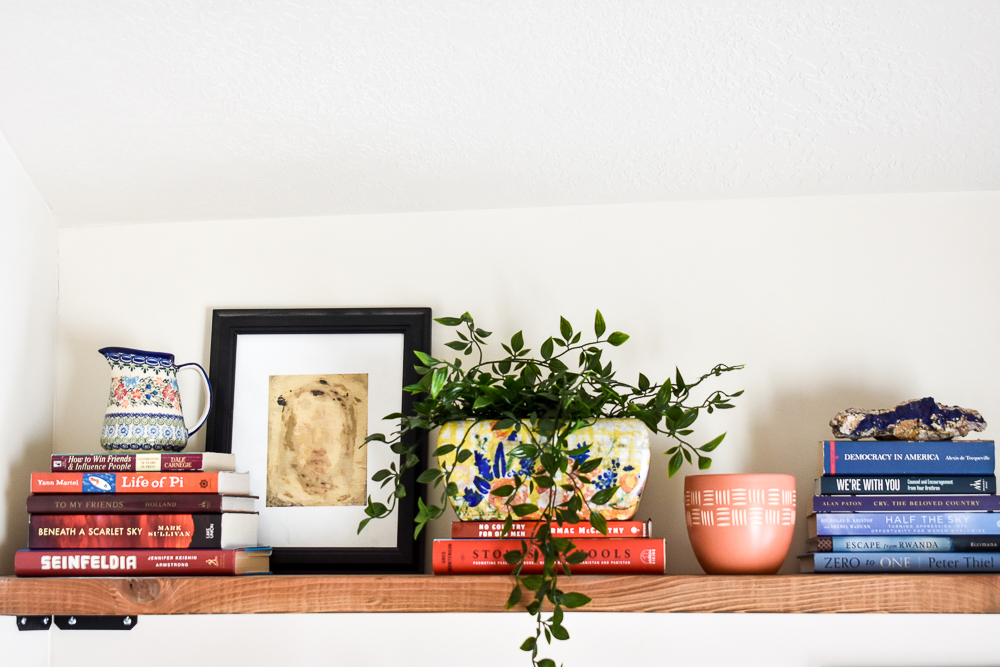
Now for the REALLY fun part: STYLING them!!

I had the time of my life styling these shelves, and I'm sure I'll be styling and restyling them often. I'll share more of my shelf styling process in a later post, but for now, I hope this tutorial is helpful! It was such a fun and inexpensive project to do and makes ALL the difference in our new home.


I love the pictures in the shelves and the colors that you play with on the pillows
ReplyDeleteFloating shelves always make a room look great! Love the placement of the items on the shelves.
ReplyDelete